Flowter for ITOps

Scale your IT operations
Shrink your workload

  • Put an end to manual API chains by wiring HTTP requests into visual workflows you can run with one click.
  • Stop guessing what failed with success and failure paths, live node status, and a full request/response timeline on every step.
  • Ditch scattered tools and scripts for one canvas where you design, run, and inspect your API flows in a single place.

From blank canvas to running workflow in minutes

v1.1.6

For developers, QA engineers, and integrators who automate API workflows without writing scripts.

Design

Create flow, place nodes, configure HTTP

  • Create a flow
  • Build on the canvas
  • Configure requests
My Flows
Health Check
User Onboard
+
Health Check
INIT
Start
GET /health
HTTP Request

Connect

Wire success and failure paths

  • Wire the graph
INIT
S F
HTTP Request
Success Failure
Display Screen
Equals / Greater / Less

Run & inspect

Play once, read timeline

  • Run with one click
  • Review results
INIT
Success
GET /health
Success
POST /notify
Running

Play locks the canvas while the workflow runs

Features

Everything you need to build API workflows

A visual node canvas, HTTP request nodes, branching logic, and deep inspection—all stored locally on your machine.

Design your flow

Visual workflow canvas

Infinite-style canvas with zoom, drag, dot-grid background; node positions and connections persist when you reopen a flow.

Drag-to-connect + branching

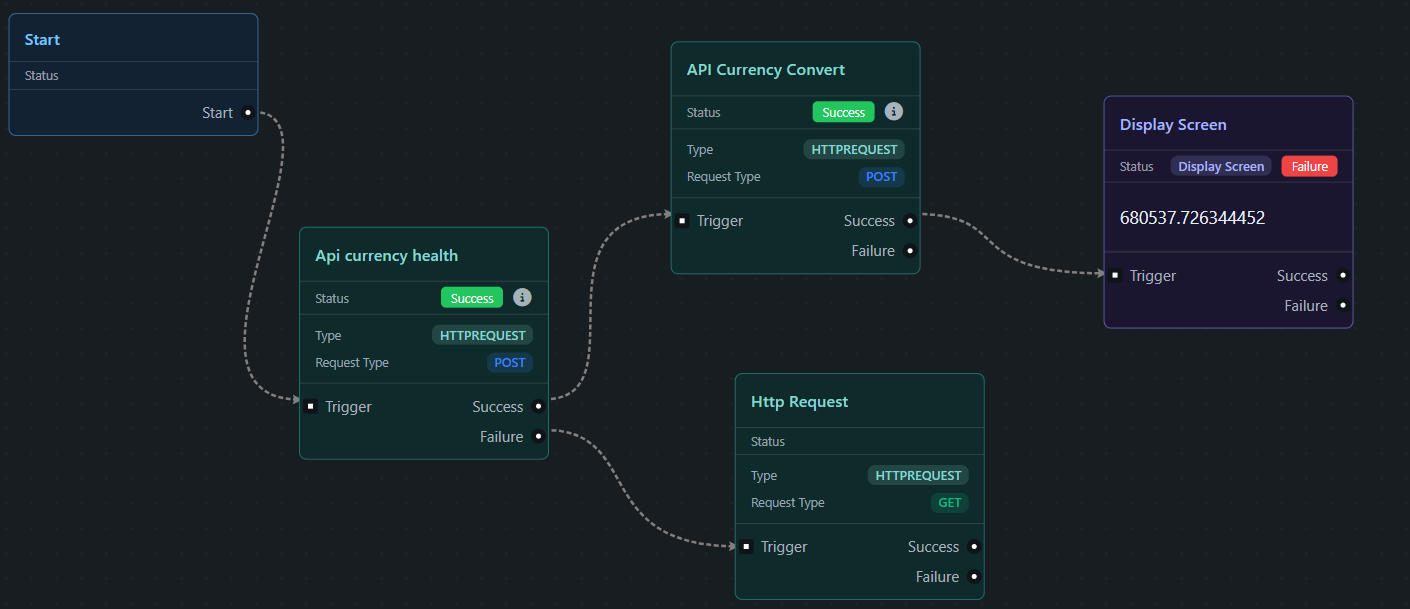
Link nodes by dragging from output ports to input ports. Success and failure paths branch the flow after each HTTP response.

HTTP Request nodes + curl paste

Full REST config: URL, method, params, body, headers. Paste a curl command to auto-fill the entire request form.

Execute and debug

One-click execution + live status

Sequential engine runs from INIT through triggered downstream nodes with live loading spinners and Success/Failure badges.

Timeline inspector

Per-node request/response details: headers, formatted JSON body, status code, and timing for every executed step.

Store and reuse values

Stack Records + local storage

Per-workflow key/value store with {{Key}} placeholders. Workflows saved locally in Documents/Flowter—no cloud required.

Screens

Every screen, explained

From the workflow canvas to the timeline inspector—each part of Flowter is designed for building, running, and debugging API chains without leaving the app.

UI preview

My Flows
Health Check
User Onboard
+
Health Check
INIT
Start
GET /health
HTTP Request
Status OK
Display

Workflow canvas

  • Collapsible flows sidebar with create, select, and delete
  • Dot-grid canvas with zoom and drag; custom scrollbars when zoomed
  • Color-coded nodes: INIT (blue), HTTP Request (teal), Display Screen (indigo)
  • Play button in header runs the selected flow with one click
  • Add menu for HTTP Request and Display Screen nodes

Node types

Three node roles power every workflow

INIT starts every flow. HTTP Request and Display Screen nodes handle API calls and on-canvas output—with type-specific Success and Failure routing.

INIT

The starting point of every flow. Its output ports define which nodes run first when you hit Play.

HTTP Request

Configurable API calls with Success and Failure output ports for branching after each response.

Display Screen

Display resolved values on the canvas with optional conditional routing based on comparison rules.

UI preview — node routing

INIT
S F
HTTP Request
Success Failure
Display Screen
Equals / Greater / Less

Start from INIT

Every flow starts from INIT — wire its outputs to your first HTTP Request or Display Screen step. After each HTTP call, the runner follows Success or Failure paths to the next connected node.

Timeline

Full request/response details on every step

After a run completes, open the timeline inspector on any executed node to see exactly what was sent, what came back, and how long it took.

UI preview — sample timeline output

Data

Pass data between steps with Stack Records

{{HealthCheck.status}} {{apiKey}}

Define your own key/value pairs in Stack Records and reference them with {{Key}} placeholders in URLs, params, headers, and body. HTTP nodes automatically inject JSON response fields into API Stack Records—prefixed by node title—so downstream steps can use values like {{HealthCheck.version}} without manual copy-paste.

All workflows are saved locally in your Documents/Flowter folder. No database, no cloud account, no subscription.

Windows desktop · v1.1.6 LTS

Get started in three steps

Flowter is a Windows desktop app for building and running API request chains on a visual node canvas. No cloud account required—workflows are stored locally on your machine.

  1. Download the installer

    Download Flowter Release LTS for Windows and run the installer. No account or license key required to get started.

  2. Create your first flow

    Add a named flow from the sidebar, place HTTP Request nodes on the canvas, and wire them from the INIT node.

  3. Run with Play

    Hit Play to execute the chain. Check status badges on each node, then open the timeline inspector for full request/response details.

No account required. Workflows stored locally on your machine.

Windows may show a SmartScreen prompt for unsigned installers.